
(A SMARTER Balanced Testing Toolkit Post!)

Tab Glue and Tab Scissors are extensions so they will sit in the space to the left of the OmniBox of your browser (the URL address bar). When you add them, through the Chrome Web Store, they will look like this:

As we are not working within Google Apps for Education so much of our work including preparation of presentations, work processing, etc. happens in a browser between many tabs. Sometimes you find yourself frequently switching between tabs. While it would be convenient if we all had a second monitor to place one window on each monitor while we work, that is often not the case. Tab Scissors allows you to split your browser window into two separated windows at the tabs you indicate. Simply click the tab of which you want Tab Scissors to split the browser window, click on the Tab Scissor icon, and your page will refresh as two perfectly split pages allowing you to see both tabs simultaneously. Tab Glue, when clicked, will paste these tabs back together as one.
See the image for an example:
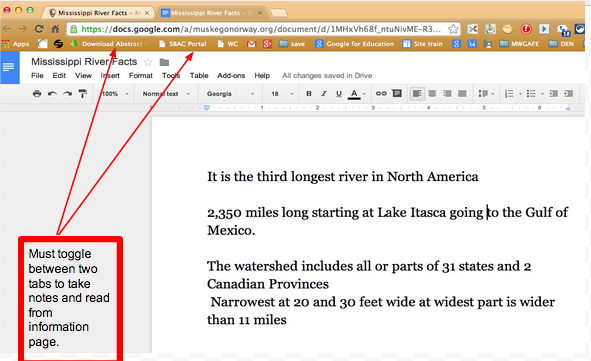 |
| Working between two tabs |
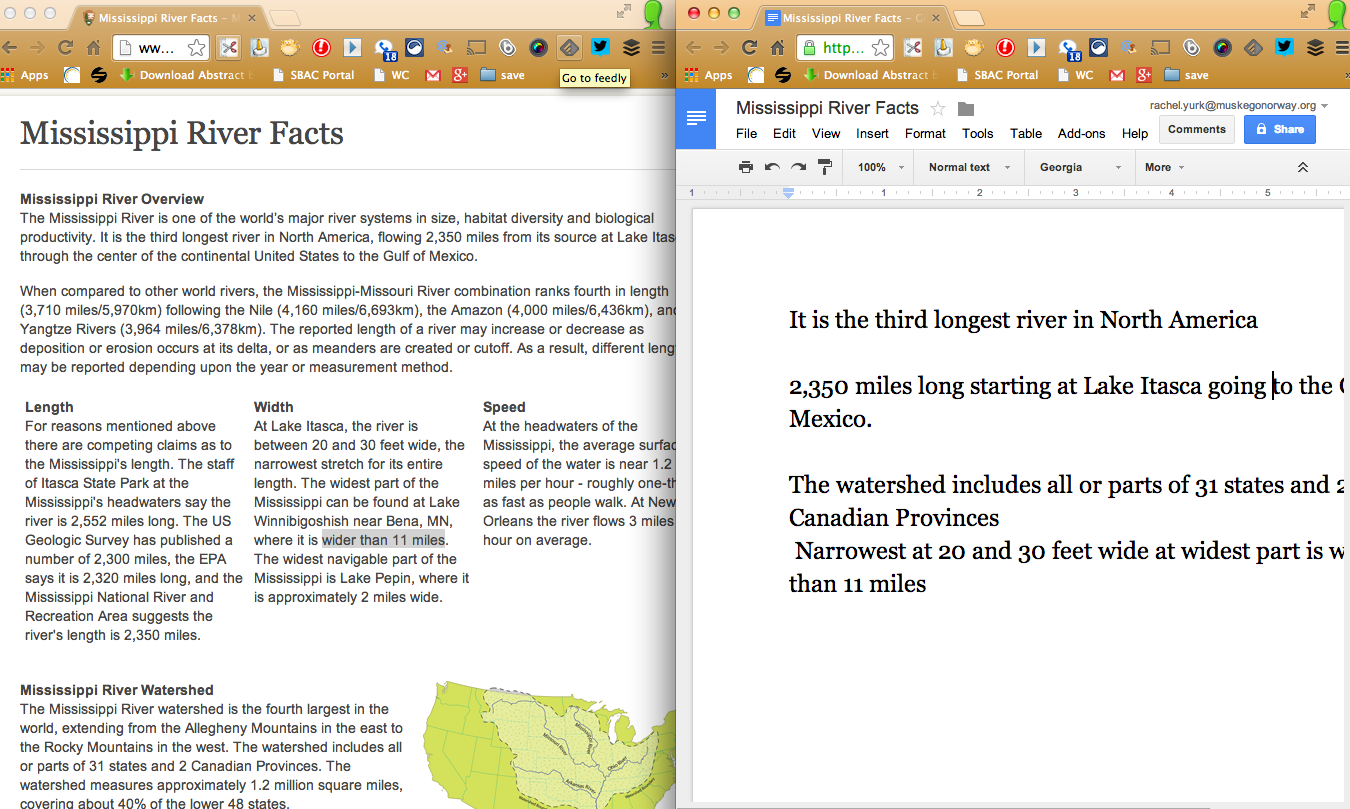 |
| Split window notes |
So what does this mean in the classroom and how can it help my students?
As our students are becoming more and more proficient with taking notes, identifying important information, paraphrasing content, and talking in multiple visual cues, we need to find ways to incorporate those skills into everyday teaching. The SMARTER Balanced Assessment had students working with a split screen throughout the entire testing situation. The content on wither side of the window can change, but if they are not practiced at attending and using both windows, they will struggle there and in other areas of digital literacy. Why not practice this concepts with our current content so it does not seem so foreign as we go into testing situations? Here a few suggestions for learning experiences that might help our students become proficient in using side-by-side windows.
- Note taking - As shown above a website on one side, notes or a presentation on the other.
- Video Notes - While there are some tools for video note taking, this might also be a way to have students view a video and take notes. (Students could even be doing this collaboratively!)
- Graphics - Interpretation of a graphic or map
- Question sets - Create a Google Form with questions to match the media on the other side of the split screens.
- Resources - provide students with an important resource on the left such as a multiplication table or other reference material as they work.
- Direction or Steps - Use one screen as a reminder tool for those that need to see directions or steps while they work.
- Maps - Allow students to have a map as a resource while they watch a video or read resources about a new area of the country.
- Vocabulary - Provide a vocabulary key or have students develop a vocabulary list as they deal with difficult literature.
- Review - Have students take a practice test or pretest for a unit of study and capture notes on what they need to study additionally.
- Back-channel - Have students in small groups collaborate on a shared Google Doc as a Back-channel discussion while working with digital content.
No comments:
Post a Comment